
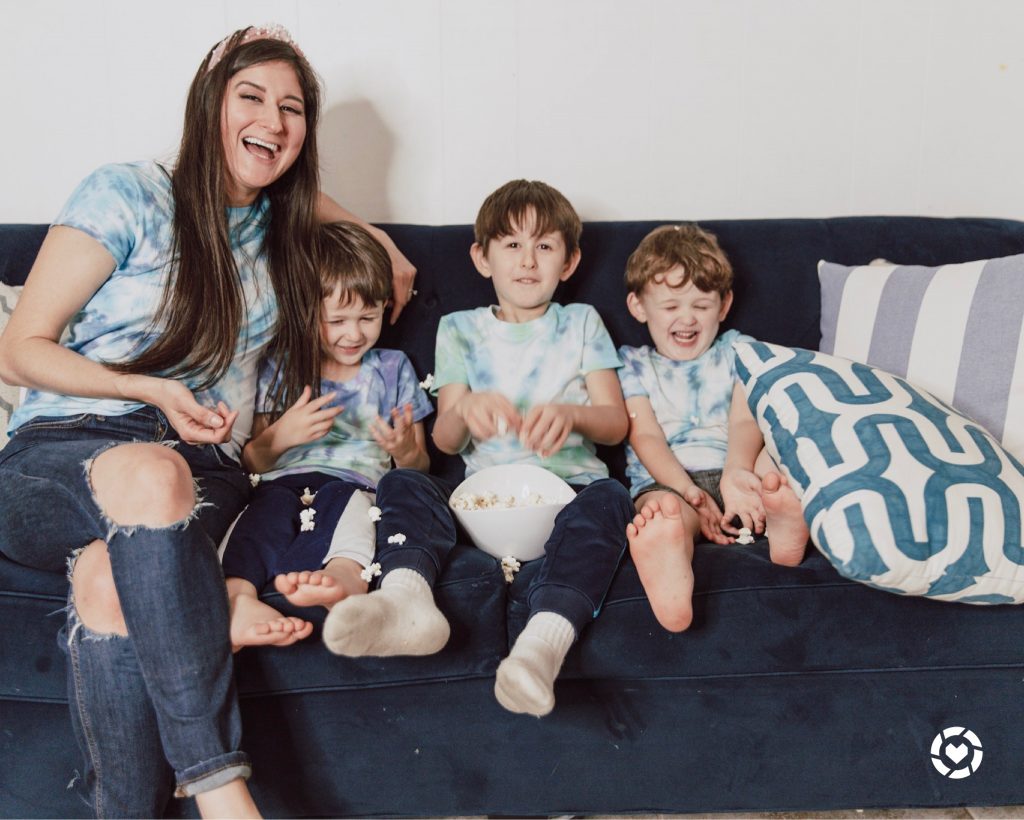
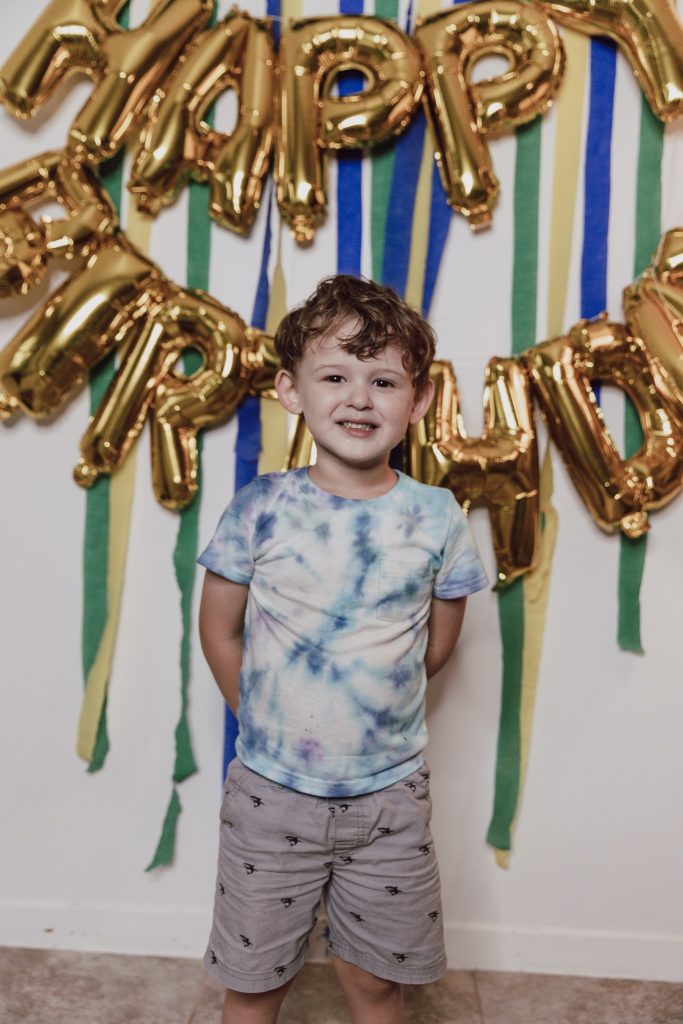
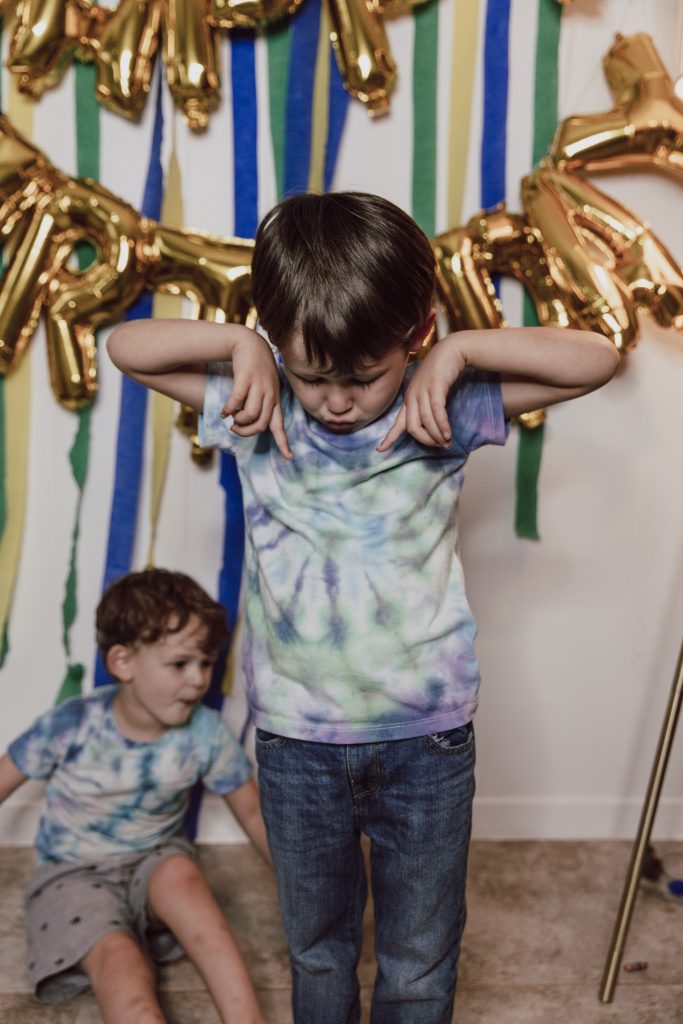
Happy quarantine day number 3857. It honestly feels that way. I have been finding new things to do while at home after homeschool, cleaning, and work, which keeps me busy enough. We tie dyed some t-shirts and they came out so cute. I had to share! In this How to tie dye shirts guide you will find the tips and tricks that I learned to tie dye.
*Disclaimer: This post contains affiliate links. I get a commission from purchases made through these links. Thank you SO much for your support of thefashionablemaven.com.
I will be sharing 2 ways to tie dye your shirts. One way is using the tie dye kit and the other is a diluted beach solution for your already colored items. We dyed shirts, a cami, and joggers.
All of these items can be ordered online and delivered to your home or through a drive up service. Hello Target. Let’s jump right in!
We made these shirts this week but I also made this shirt 7 years. The colors were so vibrant. I don’t remember how exactly we achieved this but I do remember using salt and vinegar. I will try to test this soon and report back. Also, I had one dye that I mixed 7 years ago and it still worked! It was more dull.
Materials Needed:
- Tie Dye Kit
- White Tee shirt
- Gloves
- Trash bags or plastic bags
- Rubber bands
- Squirt bottle
- Bleach
If you buy kit it will come with all of the items you will need. Ours came with 3 pairs of gloves, some rubber bands, the dye which comes in the squirt bottles.
Scroll down for the bleach method.
Step 1: Buy Kit and Supplies
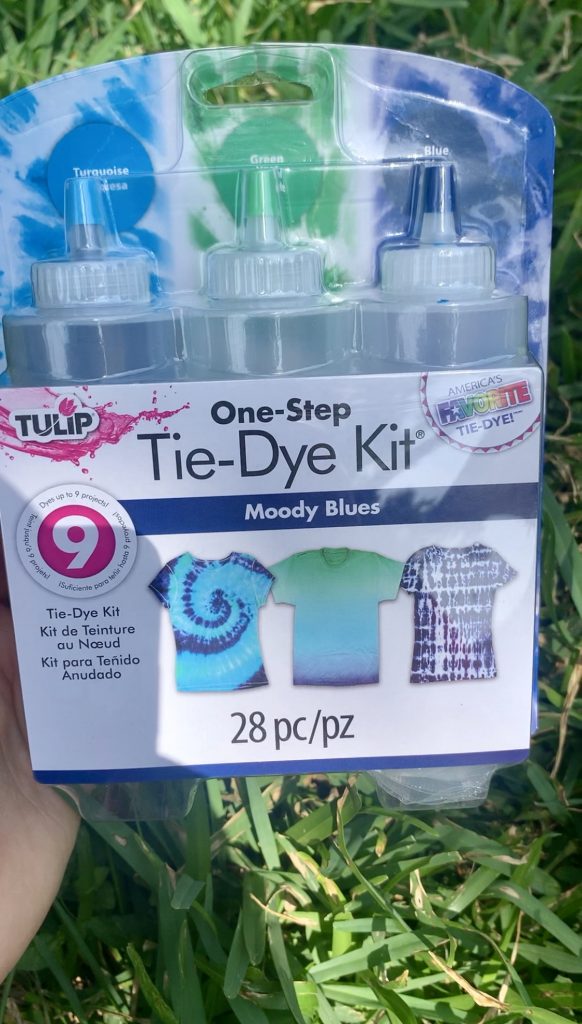
There are so many places that you can purchase tie dye kits. This in my opinion is the EASIEST way to tie dye your clothes. This is the kit we bought. We bought ours from Michaels and used their new curbside pick up to avoid going into the store during this time.
Love this DIY? Click here to learn how to make a super easy 3 ingredient sugar scrub.
We purchased these shirts from Target using the Target app for drive up. I was so happy that my tee was so soft too!
If you are using new shirts and or clothing, be sure to wash it first. No need to dry it. You can dye it straight after the wash while it is still damp
The kit comes with the gloves, rubber bands, squirt bottles, and the dye.
Step 2: Add water to the bottles
The second step is to add water to the bottles. We filled it up all the way just below the tip. You can add a little less water for more vibrant colors. The more water you add, the more you can use on other clothes.
Regular tap water works just fine. I know that you can add vinegar to your dye to make the colors more vibrant.
Take your items and wet them, wring them out until they are just damp. This isn’t necessary but it helps the dye spread more easily. We tried both ways, this is my preferred method.
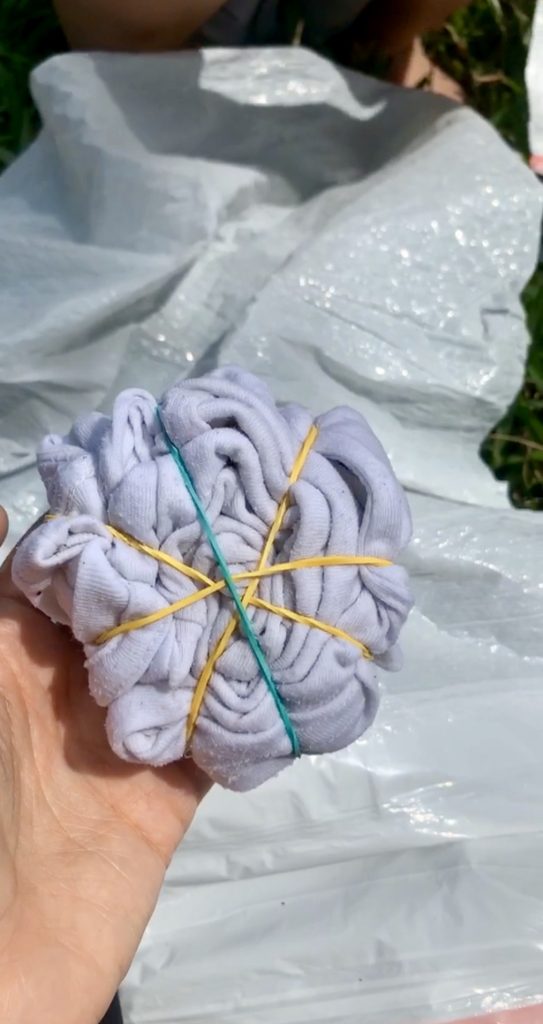
Step 3: Fold and Add Rubber Bands
There are so many different ways that you can fold your clothes to make different tie dye designs. We tried 3 different ways.
Scrunch Method
For this method, all you have to do is scrunch the shirt in different sections and then tie them with the rubber bands. It’s really easy and I love how it turns out.
Spiral Method
This method is the classic design that you see. It is also easy to create. All you have to do is lay the shirt flat. Pinch the middle and start to turn it clockwise until the whole shirt is rounded. Use the rubber bands to tie it and make it in to a pie design.
The tighter it is folded the more you will be able to see the design.
Accordion Fold
The last method that we tried was the accordion fold or fan fold. To get this look start at the bottom of the shirt and fold it over then under like an accordion or a paper fan. This is the look I achieved with this fold. Tie it with rubber bands to secure.
Step 4: Dye the Shirt
It is very important to put on your gloves for this part, if not the dye will get on your hands and in your nails and last for days (especially on your cuticles and under your nails.)
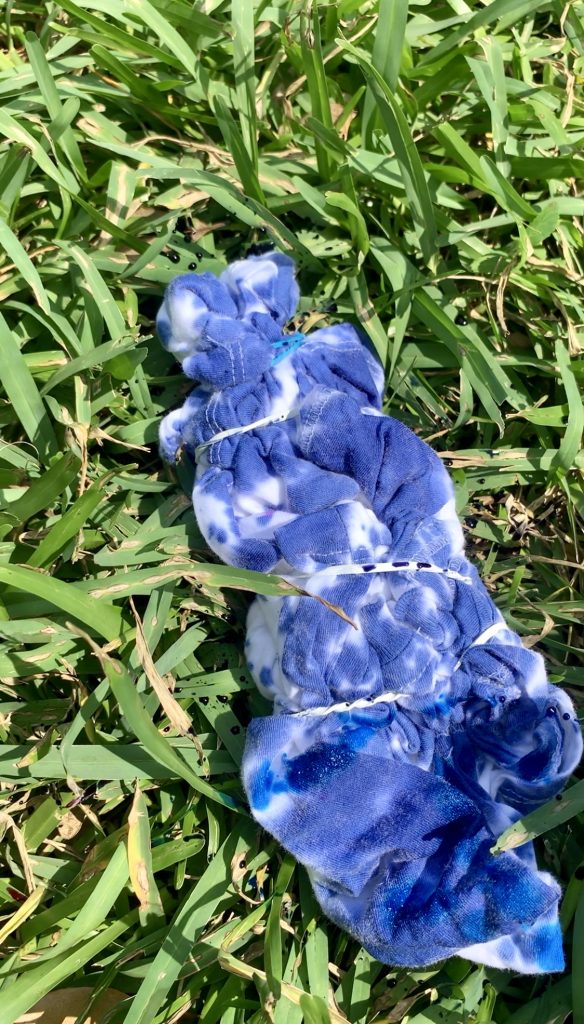
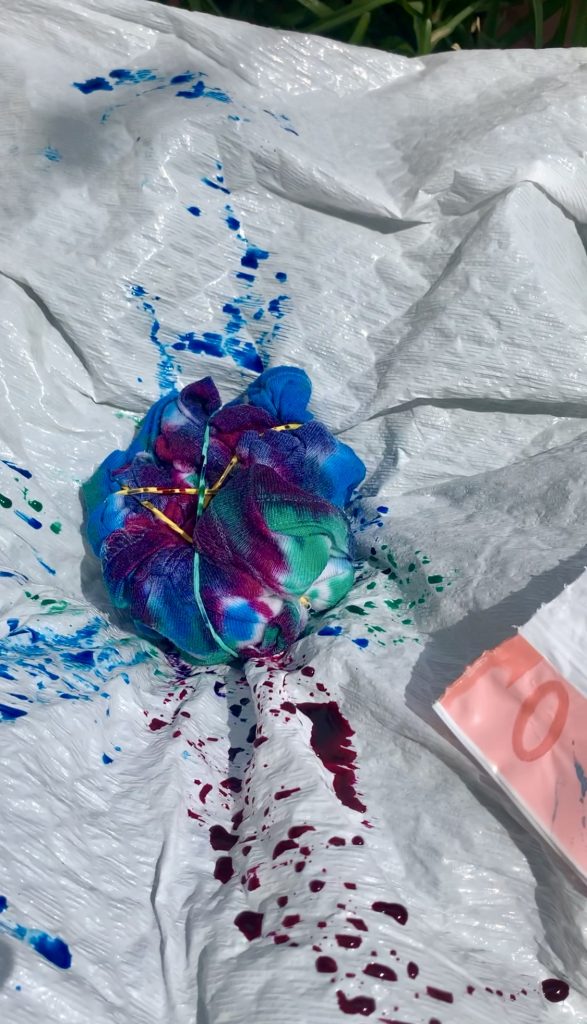
Next, pick the color(s) that you would like for your shirt to be and dye the shirt. We squirted the dye all over the shirt randomly, but you can make patterns by squirting specific colors in each rubber band section.
If you are doing this project with your kids (like I did) be sure they are pointing the squirt bottle down toward the garment before they squeeze. My 3 year old thought he was doing that and blasted me with the dye. Thankfully my shirt was already tie dyed.
Step 5: Place the shirt in Plastic Bags
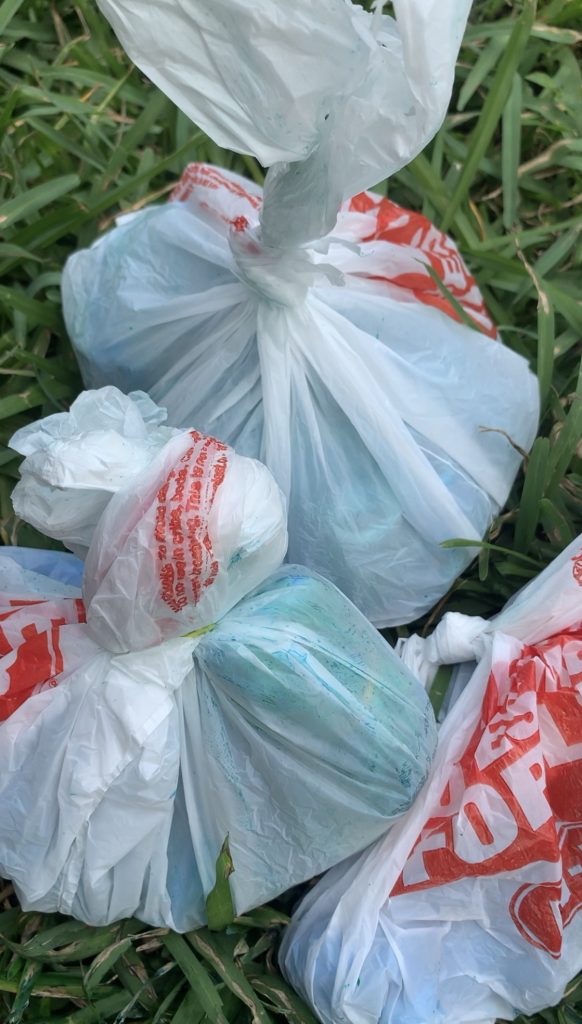
You will need to wrap your tie dyed shirts in plastic. You can use old grocery bags, trash bags, or plastic wrap. This will prevent the dye from drying out. The goal is for the dye to remain moist. Placing the shirt in a bag will solve this problem.
Let the garment sit for 6-8 hours minimum. For more bold colors let it sit longer up to 24 hours.
We let our sit for 6 hours before we rinsed them off.
Step 6: Rinse off Shirt
After your shirt has sat in the dye for 6 hours or more, it is time to rinse off the excess dye. I recommend doing this in the sink or shower. Make sure that you wear gloves for this. I did not and my hands were blue for 1 day and my nails for 3 days.
Rinse off the dye until it runs clear.
Step 7: Wash and dry tie dye shirts

Lastly, wash and dry your tie dyed shirt. We dyed several shirts and I wasn’t sure if the colors would bleed onto the other shirts so I washed them all separately. It take a little longer but that is how we were able to achieve these looks.
I noticed that the colors significantly faded after washing. I added detergent like normal but I also added some vinegar to my wash cycle as well. I’ve noticed the ones I used vinegar on were a little more bold than the ones I had not.
Tips
- Wear the gloves provided. It will keep your hands from getting dyed.
- Damp the clothes before dyeing.
- Add a small amount of vinegar to the dye bottle for brighter colors
- Let the dye sit longer for vibrant colors.
- Be creative and have fun.
Bleach Method
This method is probably the absolute easiest! All you need is bleach and water. No need to buy a tie dye kit. This is also a great option if you have already bought the kit and have the leftover bottles and rubber bands.
Supplies Needed:
- Bleach I used Clorox brand
- Squirt bottles
- Rubber bands
- Gloves
- Plastic bags
- Colored shirt (not white)
Step 1: Mix Bleach Solution
The first step to this tie dye method is to mix the bleach solution and the water in to your squirt bottles. The recipe is 1/4 cup of bleach to 3/4 cup water.
Step 2: Fold clothes to desired design
Step 3: Secure with Rubber Bands
Step 4: Apply the solution to the shirt
Step 5: Allow the bleach to sit for 10-30 minutes
Step 6: Rinse till water runs clear
Step 7: Wash and Dry
Summary
I hope that you found this how to tie dye shirts guide helpful and easy to follow. This is such a fun activity to do while at home, with kids, or on a nice spring or summer day. There are endless options and you can create such fun pieces. If you do a tie dye project I would love to see it! Please tag me on social media @jennimetz if you do!
XO,

Shop the Post

Latest Post
- Family Friendly Christmas Events Houston: Places that get you in the Christmas spirit
- 15 Brunch outfits to wear: Look chic and cute
- Look your best in these Amazon workout outfits for women
- Cozy Loungewear sets you need this season under $50
- 40 Must have Amazon travel essentials for a stress free trip